Sie ist aus diesem Classic Set: http://www.classicbargainz.com/Images/breyer-61045-eva-doll.jpg
(Breyer Saddle Up, Eva) und wurde von mir überarbeitet.
Hier hat sie bereits neue Haare und ihre Zombie-Augen sind korrigiert.
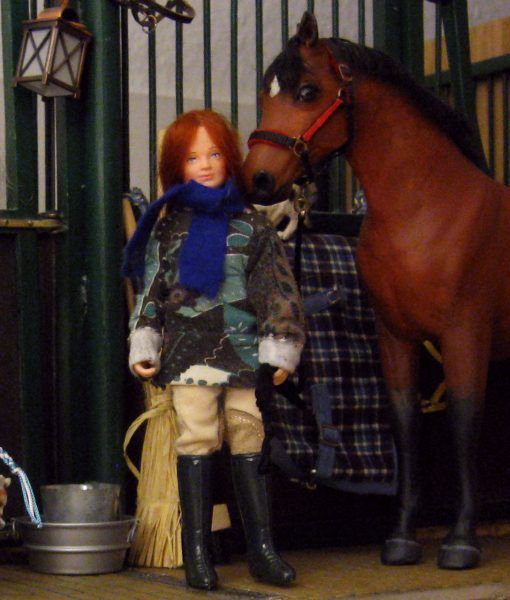
Aber da sie den Körper der Breyer Junior Reiterin hat, kann sie zwar prima stehen, aber nur bescheiden auf dem Pferd sitzen. Schließt man ihre Oberschenkel, stehen die Unterschenkel ab, da sie sich dem Pferd nicht anschmiegen. Außerdem sind die Oberschenkel im Verhältnis zu den Unterschenkeln zu kurz.
Aber alles kein Problem, mit etwas Geschick läßt sich das in weniger als 20 Minuten beheben.
Zunächst muss man sich entscheiden, ob man nur die Beinlänge korrigieren will und den Oberschenkel verlängert oder ob man ein vollbewegliches Knie möchte, dass einen korrekten Sitz zulässt.
Ich habe mich für die zweite Möglichkeit entschieden und werde nichts weiter zur einfachen Verlängerung schreiben.
Ich habe, da ich das Bein im Gelenk verlängern und selbiges ersetzen möchte, mitten durch das Knie gesägt und die Gelenkreste mit Sekundenkleber in gestreckter Haltung fixiert.
Dann habe ich in Ober- und Unterschenkel jeweils ein Loch gebohrt und mir einen stabilen, aber biegsamen Draht gesucht und die gewünschte Länge abgemessen:
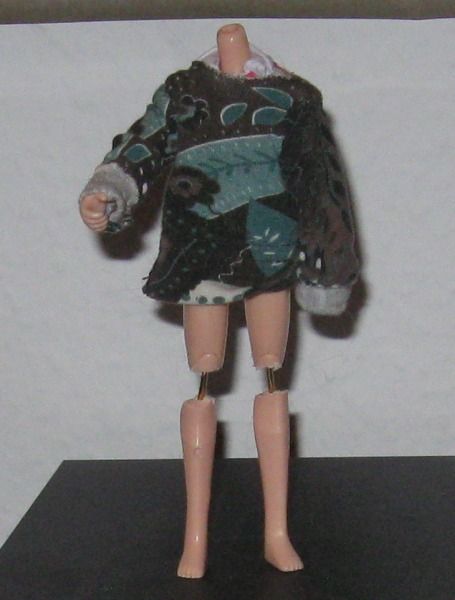
Danach habe ich den Draht mit Sekundenkleber befestigt.
Wer mag, kann den Draht jetzt auch noch festmodellieren, aber eigentlich hält das auch so, ist ja noch Kleidung drüber.
Damit das Knie beweglich ist, habe ich den Spalt zwischen den Beinstücken mit selbsthaftender Elastikbandagen-Streifen (rot) gefüllt. Damit es sicher hält, werden die Ränder mit medizinischem Klebeband (Leukosilk und so...) fixiert. Der obere Rand wird einfach fest gewickelt. Bei dem unteren Rand habe ich das Knie auf 90 Grad gebeugt und dann gewickelt. So stelle ich sicher, dass genug Spiel da ist und sich das Bein später auch beugen lässt.
Jetzt sieht es aus als würde sie zwei Tapes tragen:
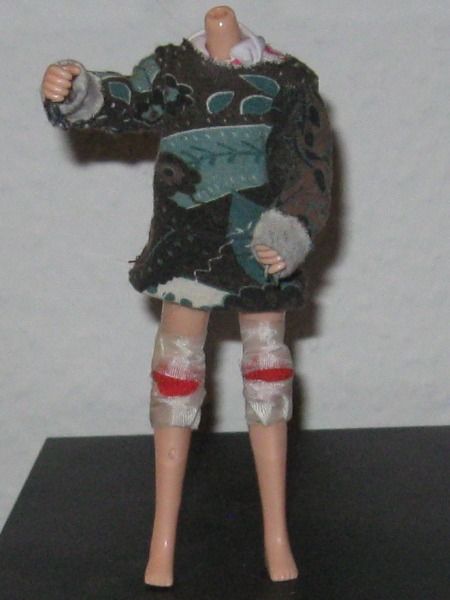
Und das war es auch schon. Die Krüppelfüßchen habe ich so gelassen, weil die so unnormal kurz sind bekommt man wenigstens die Stiefel gut an- und ausgezogen.
Nun also nur noch wieder in die Hose reinpfriemeln und fertig:
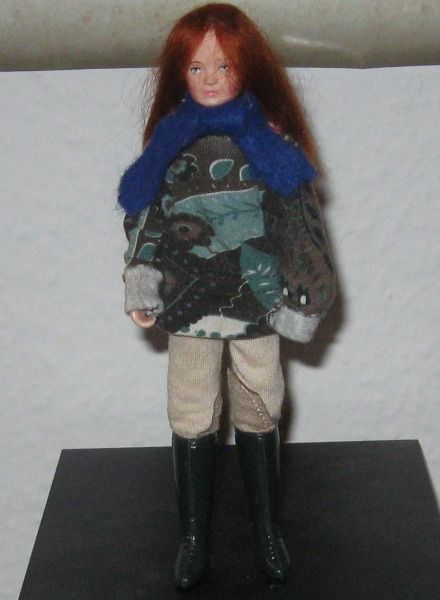
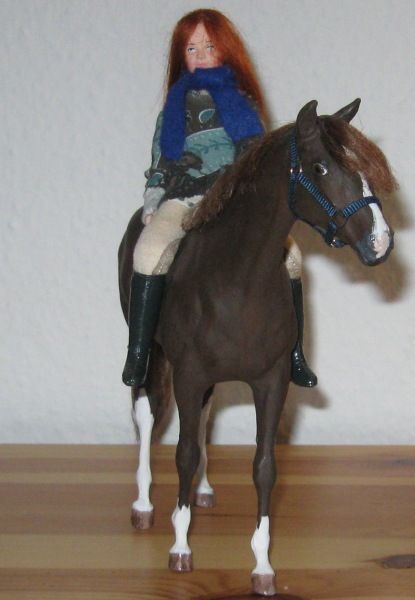
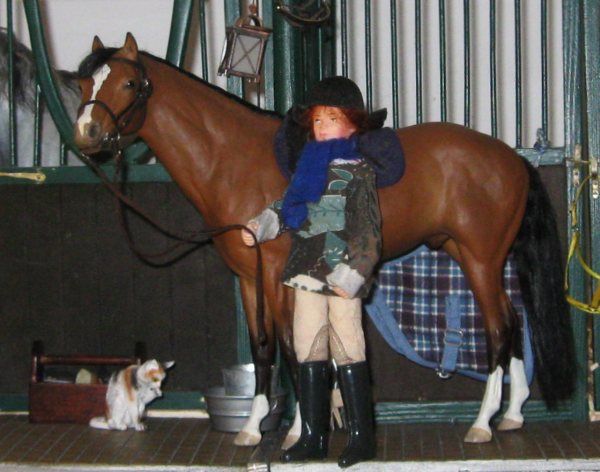
Und siehe da- die Beine liegen da wo sie hingehören-am Pferd!
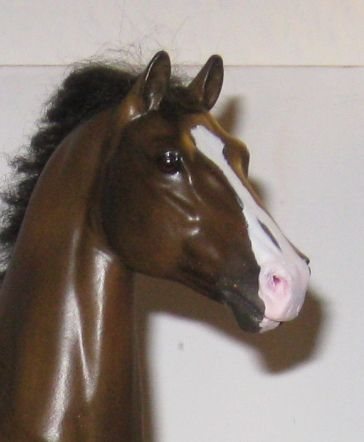
Außerdem hier noch ein neues Bild von Greif. Er hatte einen Kratzer auf der Nase und als ich diesen mit Hilfe einer größeren Blesse versteckt habe, kam mir der Gedanke, dass mehr Weiß ihm generell gut stehen würde. Hier das Endergebnis:
Die Nase ist schon rosa, die Kamera hat ein Problem mit dem Weißabgleich - hier auf diesem geblitzen Bild sieht man es:
English Summary:
There is a new kid in the barn, Daniela.
I customized her from the Breyer Classic set, Saddle Up Eva http://www.classicbargainz.com/Images/breyer-61045-eva-doll.jpg
First thing I did was correcting her freaky eyes- she had white pupils and looked like a Zombie. Then she got new hair.
And while I played around with her in my barn diorama, I remembered that the Breyer Junior Rider has a very bad seat when being astride a horse. And so the young lady was in for a quick surgery.
And if you are a little bit crafty, you can get a nicely sitting doll in about twenty minutes of time.
First you have to decide if you just want to correct the ratio of bonelength in upper thigh and calves. If so, you need to saw above the knee, because you will still need the joint!!!
I did not only want to correct the length, I also wanted a knee area that allows a correct seat with the lower legs flat at the horse's sides.
So I was going to replace the knee joint and sawed right through it. The remnants of it were moved into stretched (standing) position and fixed with superglue.
Next I drilled holes into all four leg parts and selected a solid but flexible wire and the right length for it.
Then I glued the wire to the parts and thusly reattached the lower legs again. (If I had had baking soda, I would have gone for baking soda + superglue, but I hadn't and so I used just glue.)
After letting it set, I took self-adhesive elastic tape (red) and medical tape (white) and set to finish my new joints. With the red tape I filled up the gap between the leg-endings - since it is elastic, the wire-knee can still be moved into any given direction. Then I secured it with the strong white tape. The upper part is simply wrapped on, for the lower one, you bend the knee in a ninety degree angle first and add the tape then. Like this you ensure that there is enough length of fabric moving freely to allow a bending later, too.
Now it looks as if she had a bad accident and is wearing medical tapes on both knees, but that means you are done. Wriggle her back into her trousers, put the boots back on - I refrained from giving her real feet, because the stubs she has are practical when it comes to removing the boots. *g* - and you are done.
And as proved above, you see she sits nicely, with her legs at the horse's sides.
In other news, I have added some white markings to Greif. He had a scratch on his nose and while filling it in, it occurred to me, that some more white would look very nice on him. So here he is now. And the second, bad piccie, to show that the snout is rosy- in the picture above, the camera ate the shades. *g*
